Monday, November 28, 2011

Video 3

For this next project, I decided to make a commercial for the club I am in on campus. The commercial is for Pi Sigma Epsilon's chocolate sale that is going on now. Our first step with the project was to create storyboards. Here they are:


These storyboards outline the shots in the commercial. For this commercial, I decided to essentially have a conversation with myself. I would talk to different panels of me to explain what PSE is selling. Each square demonstrates the type of shot and how it would look. Storyboards really help with the planning process as they let you visualize your work before you go out and shoot it. These storyboards were a big help in filming the commercial.

Here is the final video: http://www.youtube.com/watch?v=NDTmcWKGvY4

Here are some photos from the video:


I filmed this commercial with the camera on my MacBook Pro and edited the commercial in Final Cut Pro. As you can see, it took a lot of coordination to plan out each head movement and perspective of the shot. I had to make sure that all of the shots lined up correctly and that all of the eye-lines were correct, as demonstrated in my storyboard. As you watch the commercial, you will see the different shots of me and the chocolate fade in and out. This was done utilizing key frames and opacity. I set the opacity to 0 as the shot ended to slowly fade it out. This was a better solution than transitions which can be too intense at times. Overall, I was very happy with the way this video came out at and I look forward to continuing my experiments with time-based media.

Wednesday, November 16, 2011

Video 2 Redo

I made a change to this video. See the new one here:

http://www.youtube.com/watch?v=8LAc6NkLYTI

I took the first section and removed the cross fades from the individual pics from the art exhibit. It made the switches between them easier for people to watch. It has been received with a positive reaction.

Video 2

For this video, I focused in on taking some footage I had of NYC and going beyond my comfort zone with film. I had a whole bunch of different layers and videos/pictures going on at once. It was a lot of experimentation. I filmed this with the camera on my phone. I wanted to give it a handycam feel. I wanted to take the typical tourist video of New York and see where I could take it.  Find a link to the video here:

http://www.youtube.com/watch?v=_ByTC5GcwWs

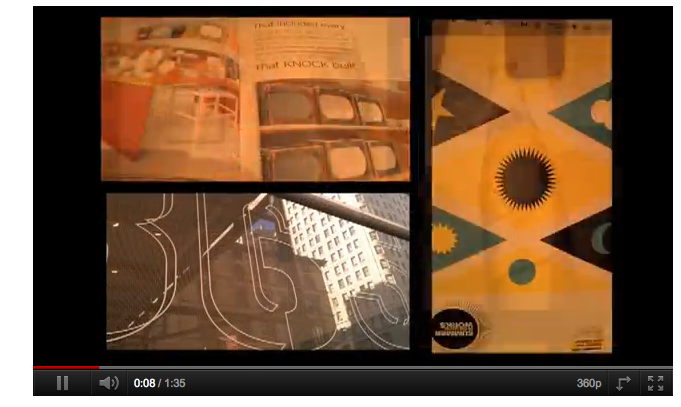
Here are some shots from the film:


This movie was divided up into three different sections. The first section was the art exhibit. I used a video shot of me walking as a transitions between the parts. It is also the beginning and the ending to tie the movie together. For the art exhibit, I did not have any video shots. I had some pictures of different pieces at the exhibition and I wanted to arrange them all in different ways. I decided to put three pictures up at once for a short period of time. I wanted the pictures to move around the screen. Shots of the name of the exhibit are static in the shot, but the pieces move around the screen. It works well with the tempo of the song. The photos have a nice movement to them as they shift around the screen. I liked the way this came out as it was kind of like an "out-of-the-ordinary" slideshow.

The second section was a piece of public art I saw while walking around. It was a room full of these colored cups. It was a beautiful display. What really caught my attention, though, was the action behind the art. Watching the people and cars moving behind it provided a stunning visual effect. I decided to replicate this by first filming for over 30 seconds as a background. I then took over 30 shots within 2 minutes to give a stop motion effect when put together. I then overlaid the pictures on top of the video to give a very unusual effect. Each picture is on the screen for less than a second. The picture of the exhibit then fades up as the video shot ends.  I was very happy with the way this came out.

The third section was a collection of videos and pictures I took while walking around the city. I decided to combine the techniques I used previously in the film and put them all on top of each other. I had a combination of video(s) and picture(s) on the screen at once. All of them are switching and fading into each other. It is really visually stimulating as it is interesting to follow the progression of a day through the shots. Many sights of the city are shown on the screen at once, compressing a 4 hour trip into less than a minute of video footage. Some of the shots and layers are not perfectly even, but I intended to do that to give the movie some depth. It helped change it up from the norm. I am happy with this section, but I am unsure if I would do a technique similar to this in the future.

Overall, I was very satisfied with the way this video came out. This was very new for me and I look forward to working with these techniques in the future. In the future, I would work with a better camera than my phone because it has some problems with focus and lighting at times.

Video 1

In class, we have now moved on to video. Here is the link to the final project I made:

http://www.youtube.com/watch?v=-DpmicJsG8k

For this video, we just needed to demonstrate some basic editing techniques. I wanted to give it a handycam feel to make it more of a personal connection for other people to continue working with this movement if I decide to pursue it. I ended up using my phone's camera to film. It was good to know how that works and the importing process. I simply have to drag the files into Final Cut Pro as opposed to capturing.


I framed each shot by putting the American flag by each piece of garbage I found. As you can see in each of the shots, the flag is either placed on the garbage, next to the garbage, or planted vertical next to it. I white balanced with a preset option on my phone's camera, but some of the shots were darker than others. It it one of the imperfections of the phone, but this is all part of the learning process. Overall I found over 15 pieces of different trash in about a half hour of walking, which says a lot about how often people litter. In the final piece, I did not do any color correction, but if I were to redo this project, I will make adjustments to make the shots look better. I added transitions between the shots to make the video more interesting and playful. I want it to be personable and make it look like anyone could do in their spare time. I would never use transitions in that manner in a tradition sense, unless I was going for a specific effect. Overall, I was happy about this project for what it was, but I look forward to improving my film making and making better shots.